Showing posts with label crafting. Show all posts

Tuesday, June 18, 2013

Happy Birthday, Mom!

My mom, superstar knitter and 1/2 of my reading public, celebrated a birthday last month.  She and Dad were visiting (and helping pack) last week, so I was able to give her a birthday present.  I love knitting for my mom because I know she'll appreciate it, whereas when I knit for almost everyone else, I'm afraid they'll think I'm giving them the equivalent of a giant 1970s-colored, acrylic, crocheted couch slipcover.  I mean, if you're not a knitter or crocheter, do you know the difference between Becky-homecky and really beautiful crafts-womanship?  I don't know.  Anyway, I know my mom knows the difference, so it's fun to knit for her.


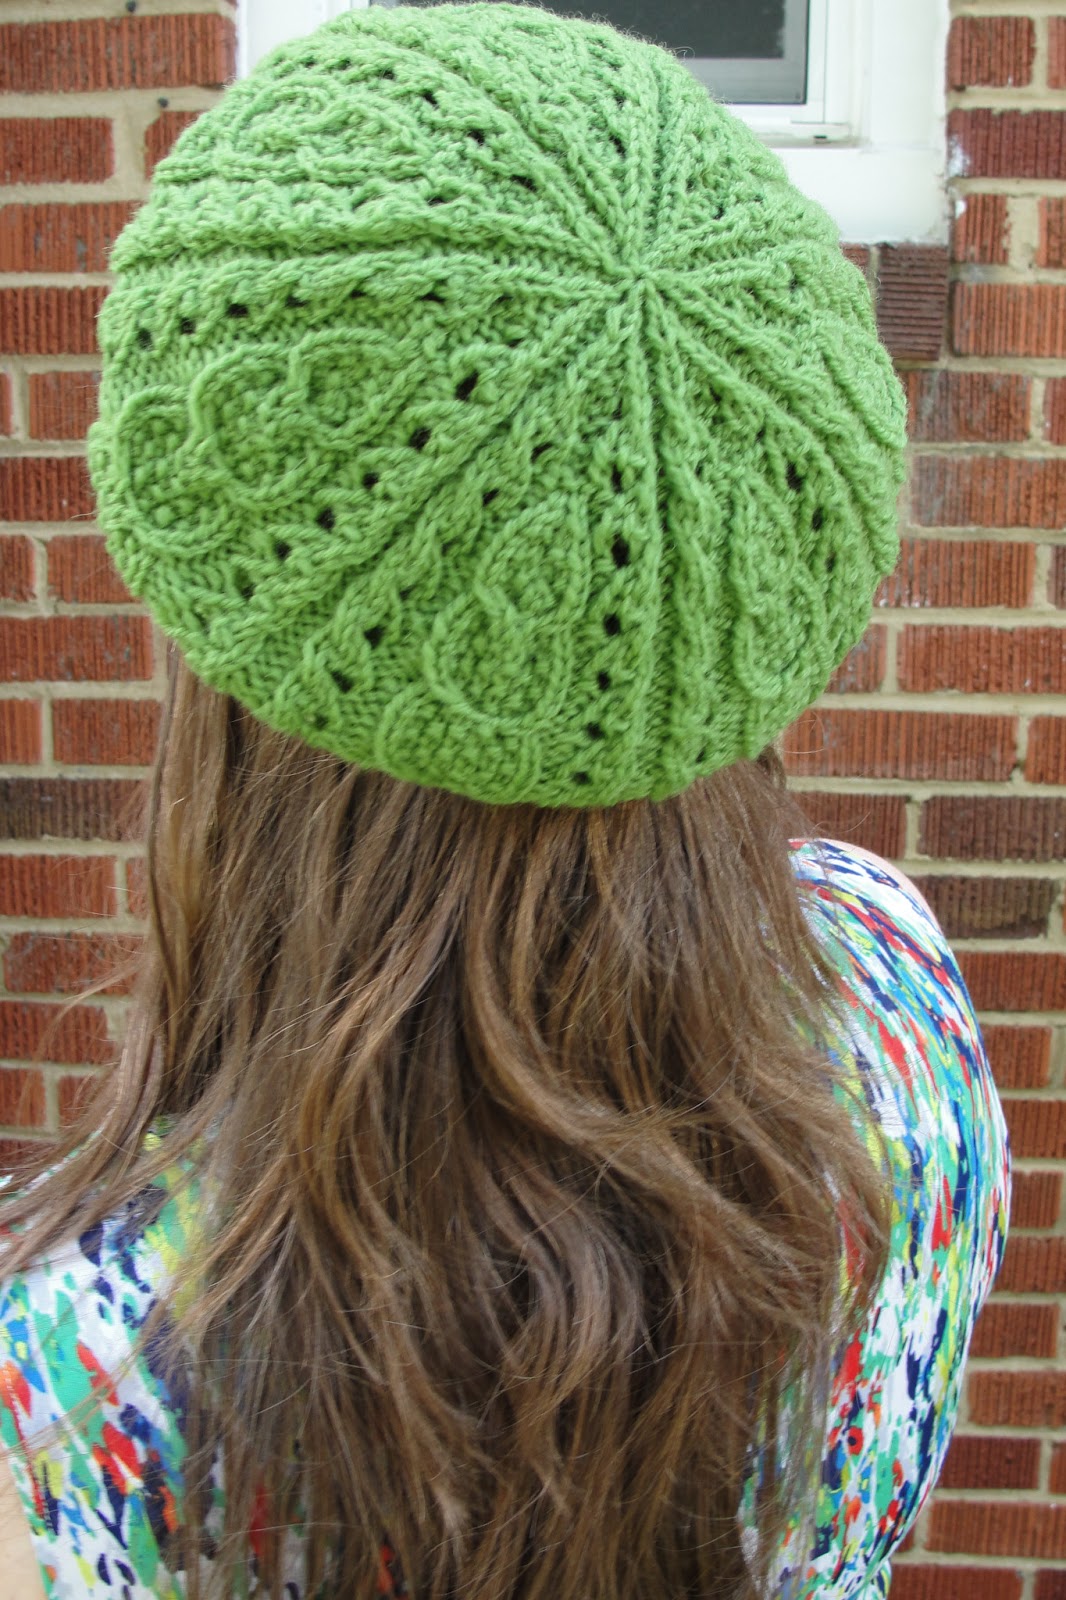
With all the cray-cray around here, I only had time for a hat, but it's a gem of a little hat!  The pattern is Plover from Twist Collective, and I can't believe there aren't more projects on Ravelry.


I found some great yarn, St. Denis, which is on sale in Webs' discontinued section.  I love the color and wish I'd bought enough to make a hat for myself, too.  I love that the yarn is light and lofty.  The cables might have popped slightly better in a more tightly spun yarn, but I still think they look pretty good.


The cables were slightly annoying to knit--crossing one stitch across three, and then knitting the three in seed stitch.  Then there was a weird instruction about doing all the yarn overs backwards and knitting through the back loop of alternating first or second yarn overs.  Even with super pointy needles, knitting through the front loop of the first YO every time was frustrating.  But I love the way it looks.  I was definitely a product knitter on this one, and not as much enthralled with the process. 
 

I am horrible at actually wrapping presents (just getting a present is sometimes all the effort I can muster), so I thought it would be fun to make the wrapping a present in its own right.  A few months ago, I pinned this project to Pinterest.  It's a simple tutorial from So Chick.  I can't believe it, but this little boxy bag only took me about an hour to make!  I'll be making more. 


If only everyone in my life were as easy to knit for as my mom!


Saturday, March 16, 2013

FO: Pockets a-plenty diaper bag

I've turned into a bit of a baby-making machine, in more ways than one.  For a while there, everything I was making was either kid- or baby-sized.  I'm finally making a couple of normal people items, but I still need to document the baby things.  Here's the biggie:


Why did I decide to make a diaper bag?  Because I wanted a new one, and it's somehow easier to justify spending $45 on fabric, $15 on a pattern, and $12 on notions than it is spending $75 on a ready-made bag.  Why is that?  Also, I loved this fabric, Notting Hill by Joel Dewberry, and this was a great excuse to use a bunch of the prints.  This project also gave me the chance to use some sewing skills on something other than a garment.  


I really love the finished product.  The bag is really big enough, and there are indeed plenty of pockets.  It has a flat bottom so it won't flop over and spill everything when I set it down.  I added purse feet to the bottom to protect it further. 


It has a zippered interior pocket and a cell phone pocket, so I guess I could pop my wallet and lipstick in there and not have to carry my purse.  We'll see. 

I had a helper!
It latches with a magnetic clasp, which is very user friendly. 

Those are the things I love.  There are only a few things I didn't love.  First, the rings on the strap are very heavy.  They really pull the sides of the bag in whenever I set it down.  I had trouble finding 2" rings as the pattern called for.  If I'd used the 1.5" rings, which were more available, they wouldn't have been so heavy.  So next time, I'd use those. 


The only other issue I had with the whole experience were the directions.  They were terrible!  I've never used a crafty pattern before, so maybe this is par for the course with these home-dec-ish projects.  But are you kidding me?  The drawings were not to scale and not very helpful.  The directions included lots of pictures for edging something in bias tape, which is a pretty common skill, but not enough pictures for things like sewing the bag sides to the bag front.  I had to rip that part out and start completely over once I realized that the bag sides actually curved around under the bottom of the bag.  In the picture, though, the bag sides ended way above the bag bottom!  Annoying. 

Also, how hard would it have been to throw a couple of notches in those pattern pieces?  That would have solved all my confusion.

Maybe this is just something that I struggled with because I never made a bag before.  But seriously. 


In addition to the bag, I also made a changing pad!  I love how this came out.  My mom came to visit for a week to help with the baby prep, and she actually sewed all the elements together and finished it off for me.  I think it looks fantastic. 


Again, though, the directions were horrific.  In fact, they were way worse for the changing pad than the bag, and made me think that no one had actually made the pad.  It felt like a complete afterthought.  The pictures showed two layers of fabric when the directions indicated one.  And it suggested sewing lining, batting and cover together with wrong sides together, then flipping right side out, then edging with bias tape!  If you're going to finish it with bias tape, why wouldn't you just sew wrong sides together and save yourself a lot of bulky edges?  That's what we did. 
There's a little holder for wipes, which folds up inside.

As bad as the directions were, though, it seems to be a great design, so maybe I should stop whining. 


I love the whole thing, and I can't wait to use it!  Although I can wait.  I only have about three weeks left, and I still feel like there's so much I need to do! 

Wednesday, January 4, 2012

Hello, deep end. Mind if I sit down?

Woah.  Pinterest.  I finally found it.  And kow I know what people have been talking about!  It's simultaneously overloading my brain (so many inspiring things!) and providing enormous mental relief (so many inspiring things that I don't have to try to remember locations of!).  Last night I was so hyped on beautiful images, I couldn't sleep.

One of the things I'm committing to this year is our home.  I'm tired of living in a place that looks like an Ikea yard sale.  We need a style.  We need some color.  We need some furniture, unless you count wooden TV trays and $25 Office Depot printer stands furniture.  But here's the leap I've never been able to make: it costs money to upgrade from "dorm room practical" to "adult style."  Yes, Crate & Barrel has amazing items for every room in the house.  But really, we can only afford actual crates and barrels.  How do people afford to make their houses stylish and still pay for things like ... everything else?

I'm slow at this sort of thing, but Pinterest is speeding up the learning curve considerably.  Example: we need a TV stand/entertainment center.  Do we have $400 for a new one?  No, and they're all uggo anyway.  So I started wondering if we could maybe retrofit a second-hand dresser as a TV stand.  Pinterest, what do you think?


Wow!  Okay, so now I'm obsessed with finding a dresser and painting it.  And covering our brownish couch with a clean slipcover.  And finding more furniture to paint.  And making curtains and pillows.  Looky!


Through the magic of the internet, these are on their way to me as we speak.  
Hmm.  Apparently, knitting is my gateway drug to full on crafting.  I resisted it for a long time, but sewing was a chink in the armor.  Now with Pinterest, I'm all in.