Showing posts with label sewing. Show all posts

Monday, September 9, 2013

Late summer round up: Antrho knock-off, Carthamus shawl, M6744


While it feels like I get no. thing. done. all day long, my FO pictures tell me I've at least been plodding along in the sewing and knitting departments.  I really want to stick these up on the blog so I can move on to some WIPs.  I'm very chronological like that.  So first up:

Carthamus Shawl


This is the Carthamus shawl by Kirsten Kapur from Through the Loops designs.  The yarn is Louet Gems Fingering in aqua and linen grey.  I ran out of the linen with literally about 33 stitches left, and some kind knitter on ravelry sent me about ten yards so I could finish.  I love TTL's designs and I queued this the second it came out.  It's kind of a hybrid between shawl and scarf, and I think it will be perfect for the colder months. 


I love the construction.  You knit the thistle lace pattern first, then knit the garter stitch shawl on to it, knitting it together with the live stitches as you go.  I just love that method of slowly knitting on (or off, in this case) a border, watching your FO take shape as it slowly falls off the needles. 


With a shawl, the blocking is almost more important than the knitting.  In this shawl, you really need to pin out each YO in the edge of the lace.  In the above picture, you can see that I started pinning the center of each thistle flower, then I went back and pinned out each YO.  Without that extra work, the lace wouldn't shine like it should.  Blocking : knitting : : pressing : sewing. 

Kirsten usually hosts a summer shawl KAL, so you can see more of her amazing shawls in her Ravelry group here. 


McCalls 6744

This will be known as the summer of the knit dress.  This one was almost a wadder, but I stuck with it.  I should have listened to my instincts.  My instincts said that even though my measurements said I should make a large, experience with the ridiculous amounts of ease the Big 4 pattern companies put in their patterns told me I should make a medium.  So when they were on a crazy cheap sale, I bought both the medium pattern and the large pattern so I could make a hybrid, medium on top, large on bottom.

Ack!  I'm not wearing my beautiful chewbeads necklace!  Just imagine it there. 
When it came time to cut, though, I chickened out and went large all the way.  So when I put it on, it basically would have been a great swimsuit coverup.  The thing is, I wasn't wearing a swimsuit.  I didn't want to give up because the fabric is incredibly soft and drapey and in a really beautiful color of blue.  So I tacked down the bodice where the front cross, and that took care of the top portion.  Maybe the faux wrap of the skirt works if you're making a maxi version of this dress, but in the short version, it was just obscene.  The fronts only overlap by about 6", so it felt like it was just wide open.  I just stitched it down until about 8" from the hem. 


While not ideal, these fixes made the dress wearable, although a bit harder to nurse from, which was kind of the point.  I've worn it several times, dressed up with a belt and some baby-friendly accessories. 

Anthro knock-off

In those summer weeks when we were moving, it seemed like everyone (mad housewife, aleah, jennifer) was making these cute little mixed print tees, and I was so bummed my sewing machine was hidden behind boxes.  It took me all summer, but I finally made one of my own.

Many people used Skirt as Top's Scoop Neck Tee, but that was too small for me.  I spent 0.5 seconds wondering if I could figure out how to scale it up, and then found the Casual Lady tee from Go To Patterns.  I made a CL tee, but I was worried it would be too small, so I made a bigger size than I normally would.  (Do you sense a theme in my summer sewing?)  HUGE.  I still wear it, but again, it's kind of like wearing a swimsuit cover up.  I used my regular size for my anthro tee, and gave it more of an A-line shape after the bust. 

Hey!  Here are my chewbeads!

Here's my final anthro knock-off.  I'm pretty happy with it, although my husband doesn't 100% get it.  He said he likes the stripes. 


This pattern calls for a wide facing/lining, which might work well in a heavier fabric.  The white stripes in my fabric were a bit transparent, and I didn't want the navy stripes showing through from the wrong side, so I cut a neckband.  I really should have stretched the neckband a bit more because it gapes too much, but summer was waning and I just wanted to wear the thing already. 

I'd have to spend some more time playing around with the CL pattern to get the fit I want, but for now, I've moved on.  I'll return to it next spring for sure, because I think it could be a good wardrobe builder. 

***
Those are some of my favorite summer projects.  I have a slew of things I want to do this fall, but I'm trying to be a bit more realistic about what I can do.  It's a lot easier to find time to knit than it is to sew, but there are a few patterns I really want to make.  My first fall project, though, is a fair isle sweater for my daughter.  More on that to come!

Saturday, August 17, 2013

FO: Simplicity 1949

I might be the only knitter in history who is a bit ambivalent about baby knits.  (Although I have something on the needles at the moment that may change my mind.)  To me, it seems like a lot of fuss and finishing, and not as much time just knitting. 


Sewing for kids, though, is something I do without grumbling.  Here's the thing: Sewing is all finishing work.  There's no sewing equivalent of knitting's mindless stockinette for me, so all of sewing takes concentration.  Kids garments are smaller, so that equals smaller amounts of concentration.  (If my logic here is not rock solid, sorry.)  Also, I can fit all of a kid's garment on my dining room table when I'm cutting it out, and they take way less fabric.  I also don't worry about fit issues. 


So as we were packing up our old house and getting ready to move, I kept working on this sweet little summer dress for Little A, who is three.  It was the perfect thing to knock out in a few spare minutes during those hectic weeks. 


The pattern is Simplicity 1949, which is apparently OOP now.  Who makes those decisions?  This is a great dress that I'll go to as long as the pattern fits.  I made the largest size, and it fits Little A well with a little room to grow.  She's been wearing it all summer, calling it her umbrella dress.

The dress came together really well, with one notable exception:


Is that not the saddest zipper install you've ever seen?  I'd already been working on the dress for about three weeks, 15 minutes at a time, and I was ready to be done.  I can't remember exactly what happened, but I do know that since, I've watched Sunni's free zipper install class on Craftsy, and I am ready for my next zipper. 

I have a couple more patterns for Little A that I want to get to for the fall.  It's nice to sew her a couple of quick things and rack up some successful FOs!

Friday, August 9, 2013

Use the good china: Thurlow trousers

When I was little, we had dinner on fine china every night.  My mom loved the china they'd received for their wedding, so we used it.  We had thick, heavy white dishes that we used for breakfast and lunch, but dinners were served on graceful, thin plates.  

Mom's china pattern -- Source


We all know the moral of this story : if you save special things for special days because they're too special to use on ordinary days, you'll never use them.  Knitters and sewers know this too, because our stashes are full of special skeins that aren't worthy of any pattern in existence.  We have priceless fabrics we don't want to ruin.

Well, now I have another category I'm waiting to use: patterns.  I keep saying, "I'll wait until I get back to my pre-pregnancy size before I make that."  But I'm tired of all my knit dresses, and even when I try to dress up a bit, I'm still feeling a bit fluffy.  So I decided, whatever.  I'm using the good china now. 

One of these patterns I really wanted to make was the Thurlow trousers by the darling Sewaholic.  I was craving something that would stretch my skills a bit, something with some tailoring and some precision. This pattern was exactly what I needed!  I had so much fun picking the pocket lining, turning welt pockets, figuring out all the mechanics of a zip fly, that I realized it wouldn't even matter if these shorts didn't fit.  I just wanted to make something nice. 


I read and reread Lauren of Lladybird's Thurlow sew-a-long posts from last fall, and I couldn't have done it without her!  While Sewaholic's directions weren't unclear, they did cram a lot of detail into each step and picture.  Seeing full size pictures of the step-by-step double welt pocket gave me confidence to just do it.  Even with the zip fly tutorial, I didn't really know how to do it until I just did it.  I'm not even 100% sure what I did, but it works, and it looks good, too!

Since I was breaking out the fine china for the pattern, I decided to not go crazy with the fabric.  I used some very humdrum cotton broadcloth in my stash and some quilting cotton my mom gave me.  If it got ruined, no big deal.  I also traced the pattern, so I wasn't risking messing that up either.  The only thing to lose was my time!  And even that wouldn't be a loss, since I'd be gaining some methods and fitting skills. 


So do they fit?  I think so!  On my next pair, I might add half an inch to the front inseam to give just a bit more room in the crotch.  Is that the right adjustment to make?  Also, after wearing these for a few hours, they stretch out, but not so much that I can't wear them.  Would using fabric with stretch solve that?  Should I use a smaller size? 

The biggest mistake I made was in attaching the waistband.  The point seemed to be shorter than the fly extension by about half an inch.  I actually took a little tuck out of the fly extension to make it match the length of the waistband, then I sewed the waistband on.  Well, when I finished that seem, I realized I had been worried about the raw edges matching, not the stitching line matching.  That half an inch was supposed to be there because at the 5/8" stitching line, the point actually matched the edge of the fly extension perfectly.  I didn't go back and fix it, but now I know for next time. 

At any rate, they're very comfy.  It's great to have a pair of shorts, and to have a clothing option that isn't too tight and a little dated.  I'm really looking forward to my next pair.  I'd love to make a pair of denim trousers for fall.  I'll be on the lookout for some nice fabric for that. 


So here's to not waiting! 

Tuesday, June 18, 2013

Happy Birthday, Mom!

My mom, superstar knitter and 1/2 of my reading public, celebrated a birthday last month.  She and Dad were visiting (and helping pack) last week, so I was able to give her a birthday present.  I love knitting for my mom because I know she'll appreciate it, whereas when I knit for almost everyone else, I'm afraid they'll think I'm giving them the equivalent of a giant 1970s-colored, acrylic, crocheted couch slipcover.  I mean, if you're not a knitter or crocheter, do you know the difference between Becky-homecky and really beautiful crafts-womanship?  I don't know.  Anyway, I know my mom knows the difference, so it's fun to knit for her.


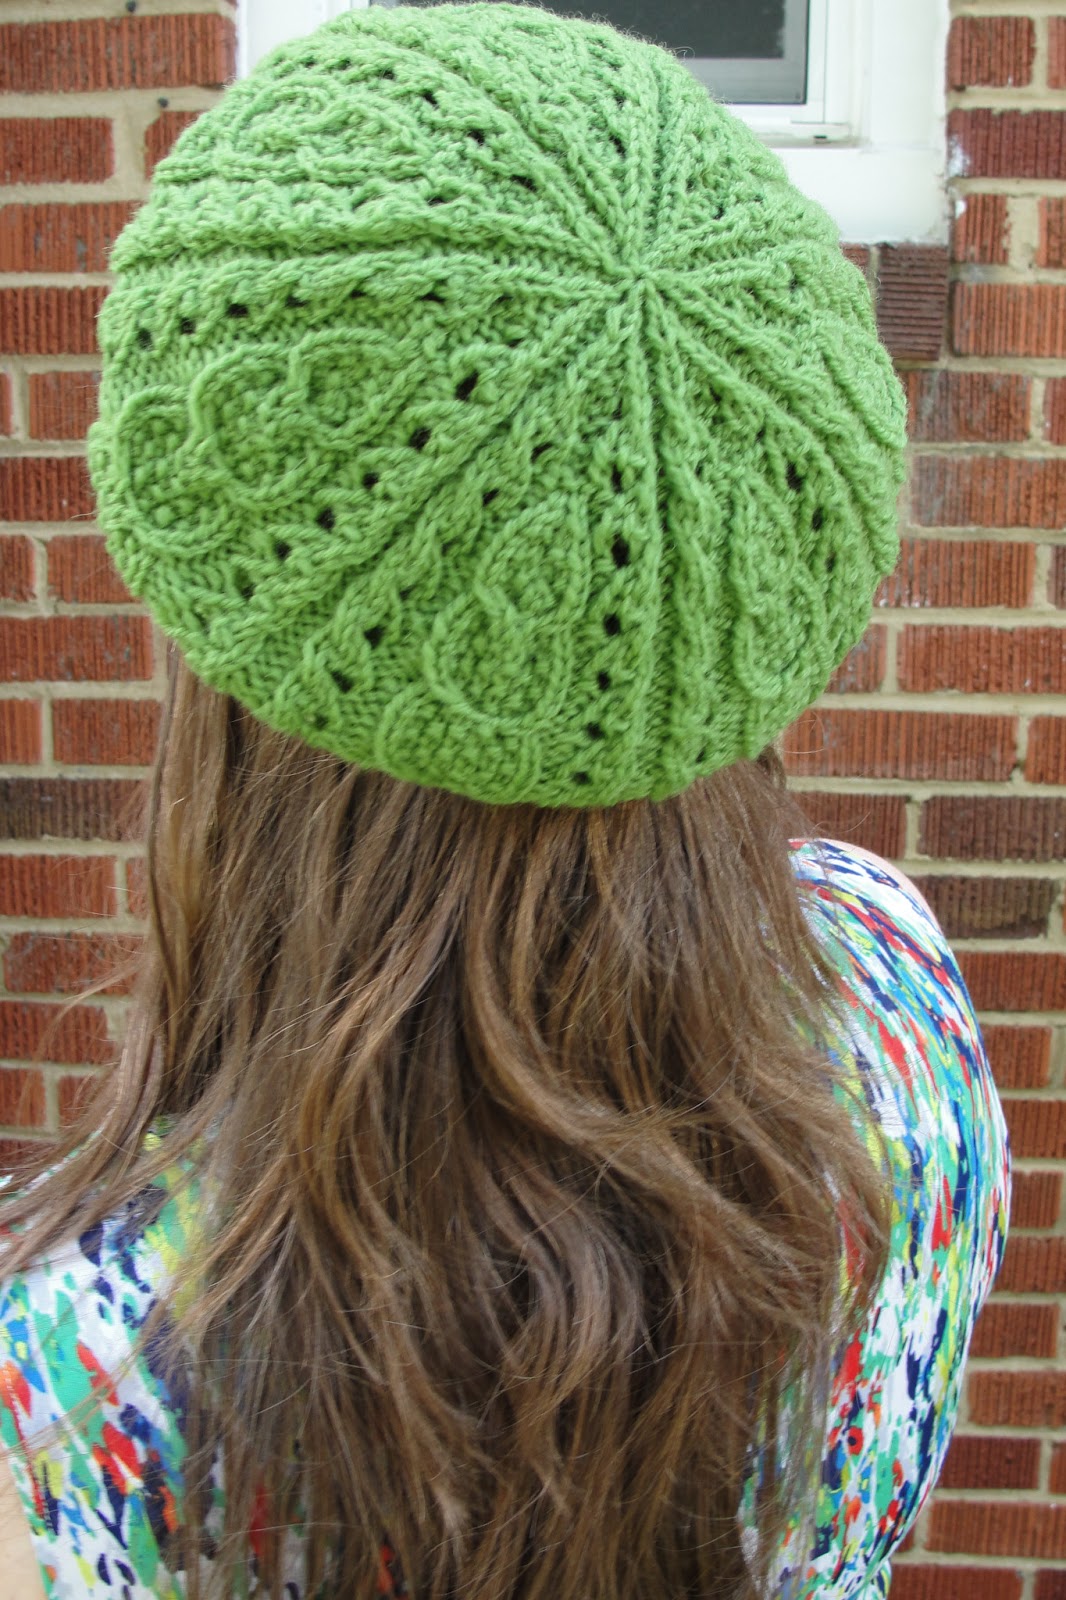
With all the cray-cray around here, I only had time for a hat, but it's a gem of a little hat!  The pattern is Plover from Twist Collective, and I can't believe there aren't more projects on Ravelry.


I found some great yarn, St. Denis, which is on sale in Webs' discontinued section.  I love the color and wish I'd bought enough to make a hat for myself, too.  I love that the yarn is light and lofty.  The cables might have popped slightly better in a more tightly spun yarn, but I still think they look pretty good.


The cables were slightly annoying to knit--crossing one stitch across three, and then knitting the three in seed stitch.  Then there was a weird instruction about doing all the yarn overs backwards and knitting through the back loop of alternating first or second yarn overs.  Even with super pointy needles, knitting through the front loop of the first YO every time was frustrating.  But I love the way it looks.  I was definitely a product knitter on this one, and not as much enthralled with the process. 
 

I am horrible at actually wrapping presents (just getting a present is sometimes all the effort I can muster), so I thought it would be fun to make the wrapping a present in its own right.  A few months ago, I pinned this project to Pinterest.  It's a simple tutorial from So Chick.  I can't believe it, but this little boxy bag only took me about an hour to make!  I'll be making more. 


If only everyone in my life were as easy to knit for as my mom!


Wednesday, June 5, 2013

FO: Vogue 8379

I love dresses in the summertime, and last year, I made several.  This year, I need nursing-friendly dresses, which are hard to come by.  I thought this would be the perfect time to try out the world renown Vogue 8379.


Per everyone else's comments, I lengthened the bodice by an inch.  This helps my torso look longer, but the narrowest part of my torso is actually a bit higher than my waist, especially right now.  That means the ties tend to ride up just a bit, as they're doing in these photos.  I'll just try to keep them in place, without constantly fidgeting with my clothes.  We'll see.


I also added two inches to the length, which was almost impossible in 3 yards of fabric.  Cutting this one out was a chore.  Since the house is full of moving boxes, I didn't have enough floor space to lay in all out at once, so I had to do it piecemeal on our table.  When it got to the last pattern piece, the skirt front, I couldn't fit it in without taking a tiny chunk out of the hem.  I patched it, and it's folded into the hem so no one will know, but I was sweating it!

This dress is great for nursing, and it feels nice on.  I didn't remove any fullness of the skirt, and I'm glad I didn't.  Right now, I need extra fullness!

I'll make another one of these this summer, if I can bring myself to cut it out.   

Meanwhile, I'm getting tired of knit dresses, both sewing them and wearing them.  I'm craving something more tailored and crisp.  But I think I need to be patient and give myself a few months before I start on that.

Monday, June 3, 2013

FO: McCalls 6073


I'm a teeny bit disappointed in this dress, but it's actually still comfortable to wear and exactly what I need.


I made two of these maxi dresses last summer, and I figured they would be breastfeeding-friendly dresses. 
I've had this fabric sitting around for too long, and it was bugging me.  Somehow, yarn sitting in my stash makes me happy.  Fabric sitting in a stash makes me antsy.  I only had two yards, though, so I was limited in what I could do with it.

That's right: I'm bring the French braid back.
My main disappointment with this dress is that I really need to wear a cami with it.  I'm not sure how this happened, as I used the same pattern pieces and same mods, but it doesn't fit the way my last version did.  I like the way it looks with a cami, and it actually works out very well for nursing, but it still feels like a bit of a misstep.  If I'm going to the trouble of making clothes, I ought to make them to fit.  If I wanted a dress that I had to wear a cami with, there are hundreds I can buy.  But because the bodice is too wide to wear on its own, it makes for a great nursing dress.  Maybe I should just starting telling myself I made it this way intentionally!

Oh well.  No time to worry about it!  I'll appreciate it for what it is--actually a very good summer nursing dress.  Or maybe I should see it as a success, since it started out sort of poorly.  On to the next!

Monday, May 13, 2013

What's wrong with this picture?


At least the stripes match, right?  This is what happens when you try to cut something out in a hurry because you only have 45 minutes during the little ones' nap time.

Amazingly, I had one section of scraps that was just big enough.


Also amazingly, the stripes almost match!  These pieces are on their way to becoming a McCalls 6073. 

So crafting moms pay $9 for buttons and cut out two left fronts.  What else do crafting moms do?

Sunday, April 21, 2013

FO: Birthday outfit, New Look 6205 and Miss Marple cardi

Our wonderful daughter turns 3 this weekend, and for her birthday, she asked me to make a purple dress.  She asked me this way back in January (when we made a birthday cake together for her dad, and she started getting excited about birthdays), so I'm not sure she'll remember this request, but I wanted the Mom of the Year award, so I followed through.

I used New Look 6205 again (first version here) in a Joel Dewberry print.  This time, I opted for the little strapped sleeves instead of the cap sleeves.


Again, the bodice is lined, but in a sort of weird way that still requires you to finish the neckline with bias tape.


I made a size 3, and the neckline is a bit big on our 3 year old, but at least it gives her room to grow. 

For the sweater, I used a pattern called Miss Marple.


Isn't that the best name for a little girl's cardigan?  Miss Marple was an Agatha Christie character, right?  I used two skeins of Berroco Ultra Alpaca that I had in my stash.  They were intended for a hat/cowl set, but I didn't like those patterns in this yarn.  So much the better, because it works perfectly for this pattern. Although I'm not sure anyone needs an alpaca/wool sweater in late April. 

The knitting only took a week or so, but it took me forever to finish the cardigan (see my previous confession regarding button anxiety).  I really wanted to practice finishing the cardigan with grosgrain ribbon on the button band.  This was good practice, and came out marginally successful.  In the first place, the grosgrain ribbon is the wrong color, but this shade purple was impossible to match.


The main problem is that my knitted buttonholes were horizontal.  I really wanted them to be vertical, so I machine stitched vertical buttonholes on the ribbon.  I'm not sure why I got such a bee in my bonnet about making the buttonholes vertical, but it seemed very important at the time.  The button holes are a little tight, and actually, the bottom one won't go through at all.  I may have to fix that. 

I found these great buttons on beadfreaky on etsy.  Again, not exactly the right purple, but I think they still work. Raverly page here.


So Happy Birthday, dear daughter!  We love you.  Enjoy your purple dress and your special day!


Thursday, March 28, 2013

FO: A couple of baby blankets


Time is waning!  I think this baby is going to be here soon.  Fortunately, I think we're as ready as we can be.  And slightly less importantly, I've finished most of the projects I set out for myself for the baby and our daughter.  In the last week, I finished up two blankets, one knit and one sewn. 


I originally set out to make the High Fidoodlity blanket, but it was just ugly.  So instead I went with the Chevron Baby Blanket from Purl Soho.  I used Berroco Vintage Chunky, a wool/acrylic blend.  It's very squishy and cozy, and should be very easy care as well. 


Our daughter is already using it to wrap up one of her baby dolls in the baby's bassinet.  That's a good sign, right? 


The other blanket I made is a little quilt made up of scraps of Notting Hill from my diaper bag. 


While I didn't use a pattern for this, I did find inspiration from Bailey Girls Boutique etsy store.  I figured, Hey, I can do that.  (And I think this counts as my quarterly Pinterest crafty completion New Year's resolution.)

I made 5" squares and sewed them together with a 1/4" seam allowance.  Then I backed it with white dotted minky fabric, which is really incredibly soft. 

I am really very happy with how both of these things turned out.  I'm looking forward to wrapping up baby boy or girl in both of them!

Friday, March 22, 2013

FO: New Look 6205

I'm trying to make my daughter a few more things, especially sewn clothes, since sewing is so speedy (relative to knitting).  I really don't care for so many of the children's clothes currently on the market.  They all seem to be more appropriate for American Idol contestants than little kids--too much glitter and neon and sequins.  I tend to like beautiful prints and unique colors and more classic shapes with slightly quirky color schemes.  I love Boden. 

So for Easter, I set out to make a Boden inspired dress.  I used a quilting cotton I found on fabric.com, and New Look 6205, which is a new pattern.  Here is the result:


 This is a raglan sleeve dress with a pleated skirt.  I liked that the pleats allowed for a fuller skirt without being gathered.  The sleeves provided for a bit of coverage without being puffy.  I love the pattern details and I love the resulting dress!

The process was a little weird.  The bodice is lined, but the sleeves aren't!  Because it's not really a full lining, you have to finish the neckline with bias tape.  I'm not super experienced with lining garments, but this seems a little odd to me.  Why not just figure out how to line the whole thing?  I didn't really spend the time to figure it out myself, either.  In fact, it was a little confusing how to sew the lining in.  You sew it along the raglan seams, with the lining right side facing the sleeve wrong side and the bodice right side. 

I'm trying to muster up the energy to repress that center pleat. 

The directions called for sewing the skirt to the bodice and lining so the raw edges would be showing inside the garment.  I thought that was a little silly, so I slip stitched the lining to the bodice/skirt seam allowance, and it looks clean and should feel comfortable. 


One thing I haven't figured out how to do is really finish the sleeve seams.  These are two-piece sleeves so that you get a really nice curve on the top.  But it seems like you'd need to clip the seams, which are then left raw because they aren't lined.  How would you finish clipped seams?  One on sleeve, I zig-zaged the seam allowance and then clipped notches.  On the other, I clipped notches and then zig-zagged.  I can't remember which one I liked better.  

I also knit her a sweet little cardigan.  


It's probably a little bit bigger than it needs to be, but then it will fit all summer.  I still need to sew on buttons before I can call it done and write a review of it.  Buttons will always be the death of me.  


I'm really excited for her to wear her new dress and sweater!  Since she'll have to share attention with a baby soon, I wanted her to feel special in a new dress.  She'll be three in a month, and she's really starting to get into telling people, "My momma made this for me!"  So I might have the messiest house in the zip code, but hey, I made a cute dress. 

Saturday, March 16, 2013

FO: Pockets a-plenty diaper bag

I've turned into a bit of a baby-making machine, in more ways than one.  For a while there, everything I was making was either kid- or baby-sized.  I'm finally making a couple of normal people items, but I still need to document the baby things.  Here's the biggie:


Why did I decide to make a diaper bag?  Because I wanted a new one, and it's somehow easier to justify spending $45 on fabric, $15 on a pattern, and $12 on notions than it is spending $75 on a ready-made bag.  Why is that?  Also, I loved this fabric, Notting Hill by Joel Dewberry, and this was a great excuse to use a bunch of the prints.  This project also gave me the chance to use some sewing skills on something other than a garment.  


I really love the finished product.  The bag is really big enough, and there are indeed plenty of pockets.  It has a flat bottom so it won't flop over and spill everything when I set it down.  I added purse feet to the bottom to protect it further. 


It has a zippered interior pocket and a cell phone pocket, so I guess I could pop my wallet and lipstick in there and not have to carry my purse.  We'll see. 

I had a helper!
It latches with a magnetic clasp, which is very user friendly. 

Those are the things I love.  There are only a few things I didn't love.  First, the rings on the strap are very heavy.  They really pull the sides of the bag in whenever I set it down.  I had trouble finding 2" rings as the pattern called for.  If I'd used the 1.5" rings, which were more available, they wouldn't have been so heavy.  So next time, I'd use those. 


The only other issue I had with the whole experience were the directions.  They were terrible!  I've never used a crafty pattern before, so maybe this is par for the course with these home-dec-ish projects.  But are you kidding me?  The drawings were not to scale and not very helpful.  The directions included lots of pictures for edging something in bias tape, which is a pretty common skill, but not enough pictures for things like sewing the bag sides to the bag front.  I had to rip that part out and start completely over once I realized that the bag sides actually curved around under the bottom of the bag.  In the picture, though, the bag sides ended way above the bag bottom!  Annoying. 

Also, how hard would it have been to throw a couple of notches in those pattern pieces?  That would have solved all my confusion.

Maybe this is just something that I struggled with because I never made a bag before.  But seriously. 


In addition to the bag, I also made a changing pad!  I love how this came out.  My mom came to visit for a week to help with the baby prep, and she actually sewed all the elements together and finished it off for me.  I think it looks fantastic. 


Again, though, the directions were horrific.  In fact, they were way worse for the changing pad than the bag, and made me think that no one had actually made the pad.  It felt like a complete afterthought.  The pictures showed two layers of fabric when the directions indicated one.  And it suggested sewing lining, batting and cover together with wrong sides together, then flipping right side out, then edging with bias tape!  If you're going to finish it with bias tape, why wouldn't you just sew wrong sides together and save yourself a lot of bulky edges?  That's what we did. 
There's a little holder for wipes, which folds up inside.

As bad as the directions were, though, it seems to be a great design, so maybe I should stop whining. 


I love the whole thing, and I can't wait to use it!  Although I can wait.  I only have about three weeks left, and I still feel like there's so much I need to do!